Make Your Business Uniquely Irresistible so You Can Make Money with Digital Products While You Sleep

Last night I was just about to set my phone down and close my eyes when suddenly it went “Cha-Ching” like an old cash-register, and I got so excited! My phone makes that sound each time an order is placed in my Etsy shop, so obviously it wasn’t time to sleep. It was time to get online and check out what was happening in my shop! To my startled surprise, I had just sold one of my digital products! Talk about timing! After all, today I want to talk to you about digital products and selling them while you sleep.

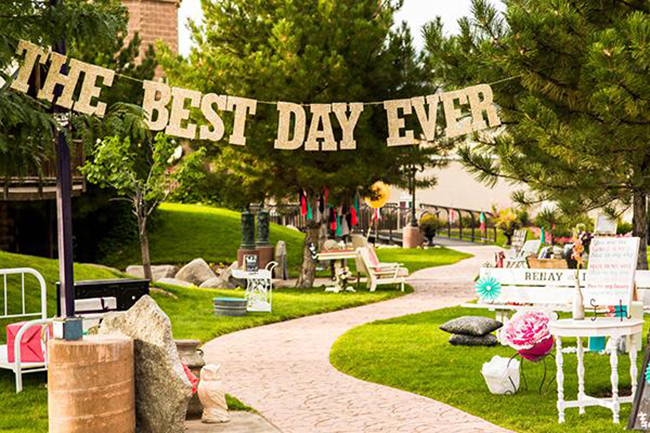
The Best Day Ever

Most of you already know my story, so you know that life is a blur right now. Nothing is easy, time doesn’t exist, and we are on one crazy roller-coaster ride trying to keep our heads above water. Originally, when I opened my business, I wanted to focus on custom wedding stationary and decor. Well, I’ve booked one wedding in one year, and it was my cousin. Outside of that amazing opportunity to create all her stationary, programs, welcome bags, guestbook, tablecloth, and signs, I’ve had a lot of interest in my enormous glitter banners and my Trophy Wife t-shirts. In addition to those products, I’ve started developing some new products that are slowly gaining in popularity: printable unplugged wedding signs, printable social media hashtag signs, and some printable wedding invitation suites.

Unplugged_Wedding_Frame2 Flower_Wreath_Invite_1_MU1 Customizable_SocialMedia_Frame2

So why the shift between custom wedding stationary and decor to printable stationary and decor? Well,because digital products are selling right now. Everyone wants what they want, when they want it. They want the instant gratification that comes with the ability to download a digital product as soon as they make the purchase. People want to go shopping in their pajamas and get the product before they head to bed. And moreover, people want to pay less for products that rock!

People want to go shopping in their pajamas and get the product before they head to bed.

Adding digital products to my business has already begun to make a difference in my business success. I’ve had bunches of people liking my shop and favoriting my printable products. It’s gotten more eyes on my small business. However, they aren’t selling! I know these products are great or people wouldn’t be taking the time to check them out, to favorite them, to like them on Facebook, or to heart them on Instagram, but what am I doing wrong? They just aren’t selling like I want them to, and they aren’t making me the money I need to to fill in the gaps between the full on custom wedding design that I do. I’d say I need to adjust my strategy!

So what do I do when I need to adjust my strategy?
I turn to some amazing entrepreneurs and their expertise, that’s what!

In this case, I’m turning to April Bowles-Olin, whom I just adore. Why you ask? For two reasons:

  1. April is successful at selling digital products (I’ve bought some of them!)
  2. April is going to be at CreativeLive teaching two classes in November! One is Create Digital Products that Sell While You Sleep and the other is Make Your Creative Business Uniquely Irresistible.

I could not be any more excited! This woman knows what she is talking about. I just know that with her help, I am about to take Pretty Much to all new heights. Get ready because great new things are coming soon. I’ve already RSVP’d, cleared my schedule, and set my reminders because when April teaches, you have to listen. When you have an opportunity to learn from April, you take it!

In April’s class I am hoping to learn several great things, but I really hope to learn about better copy-writing and better marketing for my products. I want to find out what would take my products from good to great. Where could I make some changes in order to get better results? April talks about digital products making it possible to target more markets, help us make more money without working longer hours and price our handmade products higher. I want to learn everything I can about all of this, so that digital products can help me on my way to success and freedom.

Are you ready to make your creative work more lucrative, stable, and sustainable in the long-term? Join April Bowles-Olin for an introduction to digital products and how they can enhance your creative business. This course will show you how to produce and position viable products for generating multiple revenue streams and passive income. RSVP right here to watch it live and get access to the workbook for FREE. This post is part of the Create Digital Products blog tour.

April_Bowles-Olin_Google-_1000x566-620x350

So, are you in? I sure hope so! I cannot wait for this class because I just know it’s going to be worth every second. If you are interested, you can check out April’s blog at www.blacksburgbelle.com. Even better, you can follow along on our blog tour too!

Hope to see you in the course chat-room on November 10-12th!
Signature

Cover your bases, Cover your assets, Cover your ass. Small Business Bodyguard

Everything Small Business Owners Need to Know About the Legal Stuff

Cover your bases, Cover your assets, Cover your ass. Small Business Bodyguard

Is your blog legal? Is your small business legal? Is your online business legal?
Guess what bloggers? You have to pay taxes too. Calling all bloggers and small biz owners – don’t do business without reading this first. (IMPORTANT.) Everything an online biz owner needs to know about THE LEGAL STUFF.


I’ve had a lot of questions lately about my terms & conditions, my privacy policy, and my disclaimers. I’ve also had a few questions about my contracts. Yeah, I know they are pretty great, and no, I didn’t hire an expensive lawyer in a fancy suit. Since opening my business it’s been really important to me that I cover my ass. In fact, one reason it took me so long to open my doors is because I was scared shitless that I was going to do the wrong thing and get into a legal battle. Being a business owner carries with it a lot of responsibility, and with that responsibility comes a lot of stress.

Thankfully, I don’t have to stress too much, because I found an amazing resource to help me with all the legal stuff of running a business. This resource is a legal reference tool and probably the greatest investment I have made in my business. The best part is that this non-negotiable business expense is one that I can write-off! In the long run, Small Business Bodyguard is saving me money, stress & anxiety. I know that if I do business with a bad client and don’t have a contract, there is always that chance that I might not get paid, or if someone doesn’t like the way I do business and tries to sue me over it, I am covered because I do business the right way and the smart way.

The TMFproject If you are not familiar, then you need to get familiar right now!) edited & wrote this resource it in its entirety, with the goal of making it USER FRIENDLY, EASY TO DIGEST, AND EVEN AN ENJOYABLE READ. I read it start to finish over the course of about a week, and the whole time I was laughing and smiling and actually enjoying it. It wasn’t just some intimidating, bland, jargoney resource. It’s written for the average small business owner & blogger. People like you and me! Seriously! On top of that, this arsenal was lawyer-drafted and peer reviewed. Seriously!

So what am I trying to tell you? Well, take the time to cover your ass now, so you can do business like a responsible adult. If I had paid a lawyer to draft the contracts & agreements that are included in Small Business Bodyguard, it would have cost me over $5,000 alone. During the affiliate push week, the additional $3,000 in bonus contracts & templates makes this an $8,000 value. Now, compare that to the cost of $275 for Small Business Bodyguard, and it’s an obvious no brainer.

Did you see that little bitty price tag compared to the enormous value The Small Business Bodyguard contains? It’s a no-brainer. Remember this: If you own a business, you are legally responsible for it. Getting your business ducks in a row is a non-negotiable business expense. You MUST do it one way or another or your ass won’t be covered when somebody tries to steal your work, sue you, or not pay you.

Again, I can’t stress this enough, you need this resource. I use it every single day that I am in business whether it be here on my blog, over on my website, as a seller on Etsy, and in each contract I sign with a client.

At a minimum, you should at least get your hands on the FREE smart, simple, and surefire steps checklist to becoming legally legit. Yes, I said FREE! You can do that by clicking right here!

Do you still have questions in regards to what exactly this resource is? Fear not, check it out here.Need some more testimonials from business owners that use the Small Business Bodyguard? Check out tons of testimonials by clicking here. I seriously cannot say enough about this great resource, and I abslolutely think you need to check it out.

Small Business Bodyguard
FREE smart, simple, and surefire steps checklist.

With that, I leave you to have a wonderful weekend! Enjoy it!

Signature

This post includes affiliate links, however, I only link to products I personally have used and love.

28 Days of Adding Happiness – Adding a Little Love DIY

I have to admit that I originally wrote this post for the Courage and Dash website that I currently create DIY posts for once per month. Next month I will begin writing over there every-other week. I’m kind of excited! I was planning a new post for today that was very similar but not quite the same. I had planned to DIY a lovely welcome sign for your door. We all know that welcoming friends into our home will add a bit of happiness not only to our lives, but also their lives as well. The problem occurred when I was cutting out the material and completely sliced across the entire project. Talk about some crazy arm strength! So, I decided to share this lovely post with you all instead.

One of my college professors always had us going around searching for inspiration. We were required to find something inspiring or take a picture of something each day and then use it to inspire us on our latest projects. This became such a habit, that I still do it despite not needing to turn in my findings to my professor. One day I was walking through a craft store and saw a really neat piece of artwork for sale. It instantly gave me an idea, and I knew I had to create some artwork for our bedroom.

FoamBoard_Art01Today’s DIY tutorial makes use of a really fun product that I love to use: foam board! Foam board is so versatile. It can literally be used for about a million different types of projects. It works really well in for projects when you want to create dimensional artwork or when a lightweight product is necessary. Today’s project can be created for any room or any occasion. It will work for artwork in your home or for a party decoration.

FoamBoard_Art02 What you will need:

  • 2 colors of foam board (unless you wish to paint it.)
  • A template (unless you wish to use your own handwriting)
  • Sharp Craft knife
  • Pen
  • Scissors
  • Adhesive of your choice
  • Spray glitter if you wish

***Step one and two can be skipped if you would rather use your own handwriting. Simply draw out your word or words of choice onto one of your foam board pieces.

FoamBoard_Art03 Step One:

First, using a document program or perhaps Illustrator, create and print a template. Or if you prefer, you can use your own handwriting. Personally, I do not care for my own handwriting, so I always use templates. They can be so easy to create. I created mine to scale, and then printed it to scale as well in reverse. Then I pieced it together like a puzzle and taped it into place. Don’t worry if it isn’t perfect because you can always adjust it as needed.FoamBoard_Art04

FoamBoard_Art05FoamBoard_Art06Step Two:

Cut out your template using your scissors. Don’t worry if it is not perfect. When I printed mine, I used the quick print function so the letters were not quite solid, but it saved a lot of ink. It also didn’t print all the way to the edges. Once your template is cut out you can trace it on the back of one of your foam board pieces. I find it best to trace a mirror image onto the back of the foam board so that there are not any extra marks or coloring on the front side.

FoamBoard_Art07Step Three:

Using your sharp craft knife, cut out the letters from your foam board. Make sure that you push through both layers. Once you have cut out your letters, you may need to clean up the edges. I turned my letters over to view them from the front. It makes it a bit easier to determine whether it looks nice.FoamBoard_Art08FoamBoard_Art09FoamBoard_Art10FoamBoard_Art11

 Step Four (Another Optional Step):

If you are anything like me, I can’t have enough glitter! I choose to use a spray glitter to coat the letters. You could also use spray paint to change the color of the foam board if you only have one color of foam board. Make sure that if you are painting the foam board, you wait until one coat is completely dry before adding a second coat.FoamBoard_Art13

FoamBoard_Art12Step Five:

Using the adhesive of your choice, mount the letters to the second piece of foam board. I prefer to use double-sided tape. Foam board is so light that tape is perfect for this project. I like it for this project because it’s easy and clean to use, and it doesn’t require time to dry!

FoamBoard_Art14Step Six:

Hang your masterpiece and Enjoy!The best part about this project is that you can change the words, change the fonts, change the colors, and change the purpose. You can make literally anything with this tutorial once you figure it out! So, what are you going to make? Leave me a comment, and tell me what you plan to make. I’d love to see your pictures too. Share them with me!

Don’t forget that this week is the last week of this blog series. Are you sad? I’m sad! Working with Sarah has been such an amazing experience. She is a wonderful and beautiful woman both inside and out. Her heart is bigger than the sky and her smile is infectious. Meeting Sarah has been an enormous blessing in my life, and I am hoping that it has been a blessing for all of you considering all the lovely posts she has shared with us on With Love Paper Goods. I can’t imagine not know this lady, and I can’t wait to see what projects we might team up on in the future. Head over there tomorrow to see her latest post.

Until next time,

Love!

Signature


28 Days of Adding Happiness – Kale Chips that Taste Good? Oh, yes!

I just love Sara’s unique style! Her flowers are always so pretty. Wasn’t that flower frame she made with paper flowers, just stunning? I loved it!

This Labor Day weekend, how many of us overindulged in all kinds of yummy picnic foods like hotdogs, hamburgers, cookies, or chips? It’s so easy to do, especially when we are surrounded by friends and family members that are eating the same things. As somebody that regularily eats really healthy foods like fruits and veggies all day every day, I can understand how hard it can be to eat healthy in social situations, but I’m also here to tell you that it doesn’t have to be hard.

Two years ago when I switched over to a raw vegan lifestyle, I had a ton of friends that were actually very curious about the food choices that I was making, so I decided to have a dinner party and share my lifestyle with them. I went all out with fancy table clothes, real dishes and glassware, etc for 17 people! It was a ton of work, but I prepared 5 courses (3 of which had more than one option) plus, tons of appetizers for everyone to munch on while we waited for everyone to arrive. Yes, I might be insane! The best part was that everyone loved almost everything, and several people left with recipes so that they could make some of it at home.

One of the favorites that night were the kale chips. There has been a ton of chatter about Kale lately both in and out of the health food world. People are finally starting to notice it for the amazing nutritional value and for its awesome versatility. These kale chips were a huge hit, not only because they shocked everyone with their taste, but because everyone was interested in actually eating this healthy little plant and couldn’t believe how easy it was to prepare!

I originally got my recipe from Carmella at her blog, The Sunny Raw Kitchen. She has a ton of yummy recipes, and I’ve used several of them. Check out her website, and try some of them yourself! Her recipe was found on another site called Raw Food Talk which is another really great source for raw food ideas. For more sites or more information about vegetarian eating, veganism, or Raw veganism, check out this previous post I wrote.

Here’s the recipe:

Chrissy’s Goddess Chips
Posted by Chrissy on Raw Food Talk

2 bunches kale, broken into large pieces by hand (preferably dino kale)

Dressing:
¾ cups sesame tahini
¼ cup nama shoyu
½ cup apple cider vinegar
½ cup water ~ more if needed
2 scallion
1 clove garlic
1 lemon, juiced
¼ t. sea salt
¼ cup fresh parsley

Place kale in a large mixing bowl. Combine all ingredients in a blender and blend until smooth to get a thick consistency. You may have to add more water. Pour over kale and mix thoroughly with your hands to coat the kale. You want this mixture to be really glued onto the kale.

Place kale onto a Teflex sheet, on top of a mesh dehydrator screen, and dehydrate for 4 hours @ 110 degrees. You’ll need to use two trays. Rotate kale occasionally to dry uniformly.

If you don’t have a dehydrator, HAVE NO FEAR! You can still create this yummy snack. Use your oven on the lowest setting and crack it open so that it doesn’t get quite as hot. Keep checking on the chips until they are light and crispy. They will nearly fall apart in you mouth when they are done.

If you try this recipe, leave me a message and tell me what you think, then head over to With Love Paper Goods tomorrow to see what Sarah has in store for you. Don’t forget to come back on Wednesday for another dose of Adding Happiness!

Signature

28 Days of Adding Happiness – Happiness Printable

I’m just about certain that I need to head to the market to get some sweet potatoes so that I can try that yummy sweet potato fries recipe Sarah shared with us yesterday! I just love sweet potato fries and I have ever since I tried them for the first time while living in Tennessee.

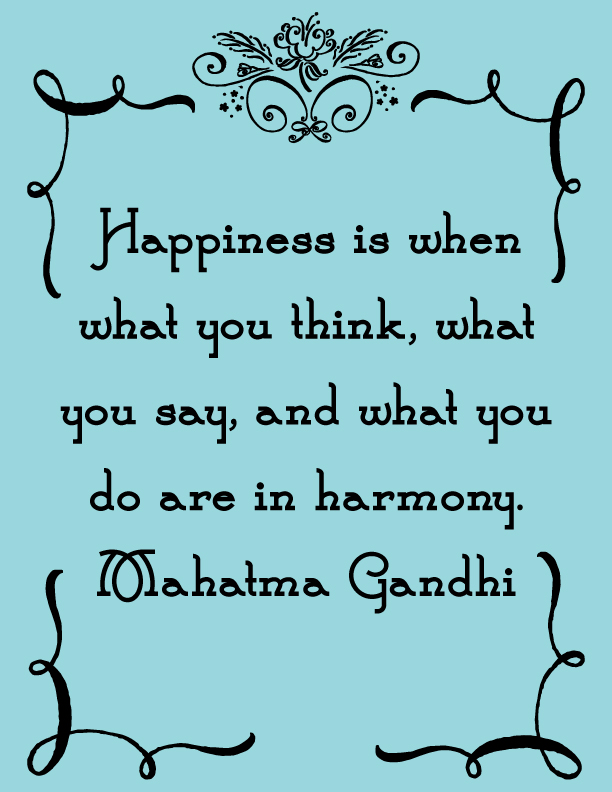
Last week Sarah talked about building happiness in her home by placing inspiring messages where her and her husband will see them most. This week, I have another inspiring printable message to remind you that happiness is a choice. Happiness is when what you think, what you say, and what you do are in harmony.

Click o the image below to download this printable.HappinessIs

Sarah has another something wonderful for you tomorrow that you won’t want to miss. Make sure you stop by With Love Paper Goods for another dose of Adding Happiness!

Enjoy the rest of your week!

Signature


A Huge Announcement: Guest Blogging!

Last week I told you all on the twitter and facebook feeds that I would be making a huge announcement this week. It has been killing me to keep this huge secret for nearly a month! Finally though, I can spill the beans. (Who came up with that saying, anyhow? I think it sounds kind of silly!) The lovely Josephine Mills from Courage & Dash got in touch and has asked me to be a regular guest DIY blogger for her beautiful London-based blog!!!! <———This deserves about a million exclamation points!  I know, I’m just as stunned and excited as all of you probably are. This is such a huge honor!

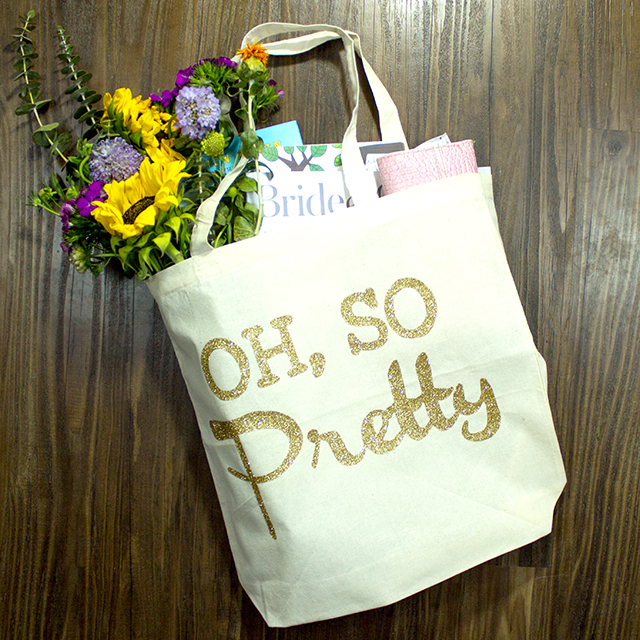
Yesterday, my first post went live. It was a super fun and super easy DIY. Do you remember those adorable totes I put up in the shop on Sunday night? Well, now if you feel up to it, you can make them yourself! I know, I know, Pretty Much amazing!

Market or Wedding Day Tote

I highly suggest that you head on over to the Courage & Dash blog, and check out, not only this easy little DIY, but also the rest of Josephine’s blog because I really think you are going to adore it! Going into the weekend, be safe and have fun!

If you wish to download the templates I have created, please click on them below:

Book Worm, Market Fresh, Mrs, Oh, so Pretty, The Best Day Ever

Signature


Progress, Production, and Purpose (Getting Your email under control)

Desk

What happens when I bring up the topic of your inbox? You know, your EMAIL inbox? Yeah, that’s what I thought! You get a little freaked out, claustrophobic, and uncomfortable! I totally hear you.

But, Why does it have to be that way? I promise you that it doesn’t! I totally just said that out loud, and you should too. Ready? Let’s say this together:

“My inbox doesn’t have to freak me out, make me claustrophobic, or cause discomfort!” (You should tweet that!)

Together we can make progress, reduce your stress level, increase your production, and give your email box a purpose!

Okay, so now you want to know how that is even remotely possible. Well, take a deep breath we are going to get through this together. First though, I need you to do something for yourself. I need you to make a commitment to this process. I need you to set aside some serious time and commit to cleaning out your inbox….and…keeping it clean! You can do it! I know you can! I know it because I have done it!

Now before you start thinking that I probably didn’t have nearly the mess that you do in my email, I want to assure you that I had a crazy, wild, tangled up, serious mess! I’m talking about emails from 2014. Hello! 2004! I had folders that I haven’t touched in YEARS! oh, and don’t get me started on my duplicates! I had folders that were labeled “Important things to keep” & “Stuff worth keeping.” What the heck is the difference? I have no idea. All I know is that when I have to scroll endlessly to find a folder to put something in, I have WAY TOO MANY folders!

Alright, now that we are in agreement that I truly had a mess just like you probably do now, let’s move on to figuring out what to do about it.

Step One!

delete delete delete! I’m serious here folks. Start with the inbox itself. Remember how I asked you to set aside some time to do this? Yeah, well, you’re going to need that time right now. Begin at the top and just keep on going. If you have to take a break, then take a break, but DON”T FORGET TO COME BACK! Be honest with yourself. Are you really going to ever read this specific email? Does it actually have anything good in it? Is it a boring email that you signed up for and never even open because you are waiting for that day when you have time? Do you even know why you received the email to begin with?

As you go through each email, I want you to think about it. If you never open the emails to begin with, scroll to the bottom of the email, and click unsubscribe. I know it’s painful! But do it. It will feel so great when you are all done. Unsubscribe is your friend! Now delete the email. Believe me when I say that this will save you so much time and energy every single day. If it’s an email that you honestly know you are going to read, leave it alone or save a PDF copy of it in a desktop folder labeled “Things to Print.” We will come back to it when we start working through your folders. If you have glanced through it, and nothing sticks out as important, then go ahead and delete it. You’ll feel better. If you have looked at the email, and you know that you are going to use the info in it, you can either hold onto the email until we work through your folders or you can save a PDF copy of it to your desktop folder labeled “Things to Print.”

Continue going through your ENTIRE inbox until you have made a conscience choice for each individual email. Delete the ones you don’t need. Unsubscribe to the ones you never read, make PDFs out of the ones you need to print for reference, records, or other purposes, and only keep the ones that you absolutely must. These could include electronic receipts for items you have not yet received, correspondence with your wedding/event vendors, & anything that you might need to use later as proof of a conversation, permission, or consent.  (When I worked in corporate America, I would often forward email chains from my work email address to my personal email address because people were often pretty shady and I needed to cover my ass.)

I actually had emails in my inbox from my first husband while we were on-again/off-again & through our long and difficult divorce. Some were from one of my best friends/boyfriend, Ryan, who was killed when we were in Iraq together in 2007. I even had emails that I wrote to him after his death as a way to deal with the pain. I cried as I read some of them. It was literally a painful experience to go through all of that, but it was also pretty therapeutic.

Step Two!

First, congratulations for making it through step one. I know that was hard, but you did it! Good for you. Doesn’t that feel awesome!?! Let’s say this together:

“I cleaned out my email inbox, and I feel better already!” (You should tweet that too!)

okay, okay, step two… time to go through all the rest of your folders. this won’t be quite as difficult or painful as step one. The hard part is over. Now, I want you to do the exact same thing for all the rest of your folders. The catch here is that once you empty a folder completely, you are going to delete it. Yup, delete it! Just trust me, it’s for the best and for the greater good of your soul. If you can’t completely empty a folder, then, and only then, I give you permission to keep the folder. At least for now. Remember though, you are trying to make your life easier. You are going through these in order to reduce your stress level, increase your production, and give your email a purpose other than just collecting digital trash. Think of it as reducing your cyber footprint! I believe in you.

Step Three!

See? I told you the hardest part was over and that step two would be a lot easier. Good for you! You are almost done. How are you feeling? Do you feel like a superhero yet? Because you certainly should! Say it with me now:

I took control of my email because I am a superhero! (You know the drill, tweet about your progress – you deserve to brag!)

This step is even easier. I promise! Are you ready? Alright, now is that time for creating. At this point, you are no longer destroying the countless number of digital files like a destructive giant crushing your inbox. It’s time to create something you can be proud of. I am giving you permission to create some folders. You may also re-name any of the ones you kept during step two. You can even combine folders when it makes sense to do so. Here is a list of the folders that I have in my personal email:

  • School – for emails related to school that I have not yet been able to turn into PDFs or print and file.
  • Digital Receipts – for receipts that I either need to print and file or receipts for products that I have not yet received in the mail.
  • Disney 2014 – yes I have a folder for saving everything about our upcoming trip to Disney World so it is all in one place and can be accessed from anywhere in case I loose any of the information and as proof of payments and purchases.
  • Life is Messy Bootcamp – Mayi Carles has an amazing e-course, but after my surgery I got way behind in the course. I have all the emails in one folder so that I can catch up with all of her awesome activities and drills as I have time. The emails contain links that I need.
  • PDF – If I know that I need to turn an email into a PDF and print it, but I don’t have time right that second, I put it here. Having an empty inbox feel so much better than having a bunch of To-Do tasks staring back at me.

So, now that you know what I have going on, you can decide for yourself what the best way to handle your folders will be. Although you don’t have to have only a couple folders, I don’t recommend having too many. When you have too many, that’s when you tend to make even more because you can’t find the one you thought you had. For example, I had a folder labeled “From Me” and another one labeled “Emails to Myself” and both contained emails from my corporate America work email accounts that I sent to my personal account in order to save my ass in case of emergency situations that came about because of shady coworkers, shady bosses, and shady business practices. I probably didn’t need two folders for that same purpose, but since I had about 50 folders, sometimes it just became easier to make even more folders and even more email clutter. Don’t let yourself fall into that trap!

Step Four!

Once again, you did it! Hooray for you! I hope you are currently standing with your hands on your hips in front of a fan so that your superhero cape can blow in the breeze. I bet you look like a bad ass, because that’s exactly what you are! You are awesome!

That step wasn’t too bad. In fact, it was kind of like a half-step. I don’t have any cool ideas for a tweet about that one, but if you come up with one leave me a comment and I’ll add it in. You should really think of one anyways so that you can tweet about your awesome progress. Yu totally deserve all of these bragging rights because man are you working hard! I’m proud of you!

Step four could be the easiest step of all, but it could also be the hardest. Step four is all about maintenance. You just did all of this hard work. I would hate for all of that time you spent to go to waste. It’s time to keep your inbox clean. Don’t worry. I know you can do it. Each day, take 5 minutes to go through your inbox. Delete and unsubscribe to any emails that you don’t read. Remember, Unsubscribe is your friend! Print any emails that you need to keep for reference or file into your records. If you have a folder called receipts like I do, make sure that you go through it about once a week or once every-other week to clean it out once you receive your products and are happy with them. If you think you might need that proof of purchase later, print it out or create a PDF. If you have a folder labeled Disney 2014, (that would be pretty awesome) delete it when you get home from your Walt Disney World trip. And, at least once a week, empty your trash can.

You did it! I told you that you could do it! Doesn’t it feel good to make progress, reduce your stress level, increase your production, and give your email box a purpose?Let’s say it together:

“Today I made Progress, reduced my stress, increased production, & gave my inbox a purpose!”(You should tweet this last one for sure!)

Go Fly a Kite

Do you have any more tips for cleaning out your inbox? If you do, you should leave me a comment. Tell me how this has changed your life. I love to hear from my readers. Don’t forget to share this post with your friends on Facebook, twitter, or any other social network.

Signature